One of the perks of science writing is getting to visit places few others ever go, from the cold reaches of Antarctica to the bowels of a particle accelerator. Writers on assignment for a large newspaper or magazine might be lucky enough to make these reporting trips in the company of a professional photographer (in which case, see TON’s story on collaborating). More often than not, however, we go alone—especially as freelancers. And if we want anyone else to lay eyes on the wonders we have seen, we have to bring back photos.
For some writers, iPhones are more than sufficient for visual note-taking, and—in a pinch—providing art for a story (see here for TON’s story on smart-phone videography). But if you’re a writer with an inclination toward photography, exploring it more seriously can offer a slew of benefits, like selling stories that wouldn’t fly without high-quality pictures and making more money off of reporting trips. But first, you have to get the gear and learn how to use it.
Choose Your Weapon
The first step is to decide what class of camera you need. “Unless you are really interested in developing your photography skills, a nice point-and-shoot is sufficient for most stories,” says Lindsay Fendt, a freelance journalist and photographer based in Costa Rica. Many, like the Canon G-series, which Fendt recommends, are affordable, compact, and increasingly powerful. Playing around with a simple camera can also help beginners improve their photography skills.
However, if you aspire to see your photos in print, it’s worth shelling out for a digital single-lens reflex camera, or DSLR, says freelancer Mark Schrope, who wrote a great series on photography for writers at Pitch, Publish, Prosper (the companion website for The Science Writers’ Handbook). The benefits include higher image quality (especially if you shoot in raw format) and increased control—for instance, to set long exposure times in low light, or to adjust the focus of your subject and background. However, Schrope says, “as cheap as they’ve gotten, relatively speaking, [DSLRs are] still an investment,” especially if you upgrade from the starter lens, which most photographers recommend doing.
As of recently, there’s a third option known as mirrorless cameras, which have attracted fans like Seoul-based freelancer Mark Zastrow. These models offer many of the perks of a DSLR, including interchangeable lenses and manual controls, but without the bulk and cost. The main drawback is the touch-screen interface, Zastrow says, which can slow you down when reporting. “A DSLR is going to turn on faster, it’s going to respond quicker, it’s more tactile,” he says. With both DSLRs and mirrorless cameras, you can choose between full-frame or crop sensors (the sensor is the part of the camera that actually records light) which determines image quality, field of view, and price (here’s a good rundown of the pros and cons of both).
However, Zastrow says that as technology continues to improve, you almost can’t go wrong with any newish camera. It’s easy to get bogged down in endless online reviews (if you’re interested, check out Ken Rockwell’s site), but Zastrow recommends going to the store and testing out how different models feel in your hands. “For me, the most important part is not the technical specs at all,” he says. “It’s buying a camera that you’re going to want to carry around with you.”
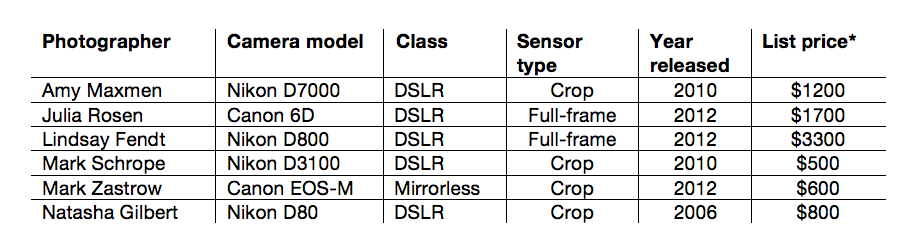
Our Sources’ Favorite Cameras
Aperture, Shutter Speed, and ISO
Once you have a camera, you have to learn how to use it. At the most fundamental level, that involves mastering the relationship between shutter speed (how long the shutter is open), aperture (the size of the opening that lets light in), and ISO (now a digital proxy for the light sensitivity of different kinds of film), and what each does to your photos. Luckily, there are countless tutorials online, and most community colleges also offer introductory photography classes. You don’t even need a DSLR to manipulate these parameters, as many high-end point-and-shoots allow you to work in manual mode (here are some ways to “trick” cameras that don’t).
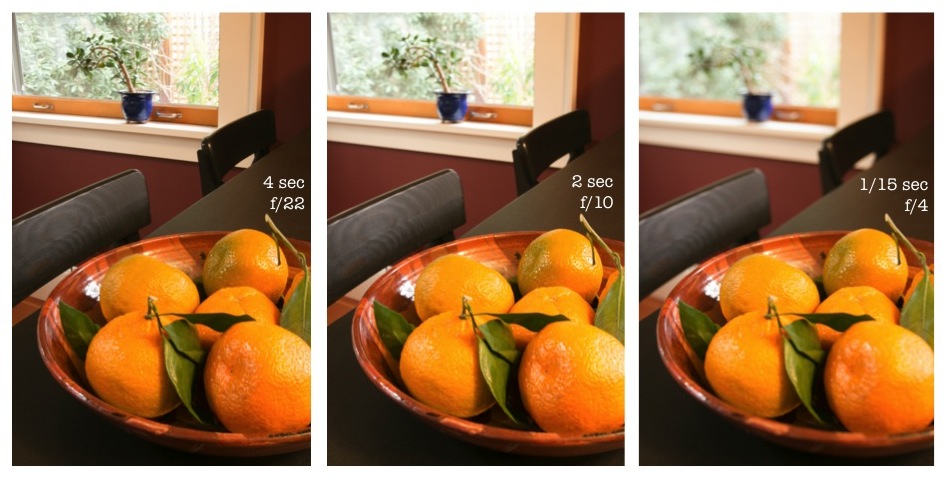
The three photos below illustrates how different apertures affect depth of field. The photo on the left was taken with an aperture of f/4 (the largest this lens has to offer), the one in the middle at f/10 (mid-range), and the one on the right at f/22 (the smallest). Notice how the oranges in the foreground look the same in each (they are always the point of focus), but the jade plant in the background is blurrier at larger apertures. Notice too that the shutter speed must be increased at narrower apertures to let in the same amount of light, and thus, get the same exposure.
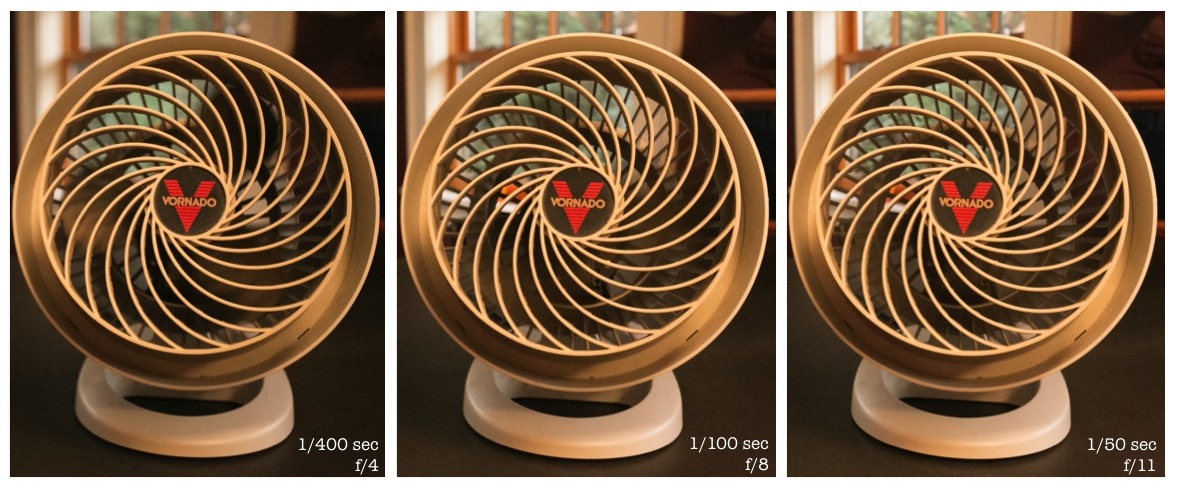
The three photos below illustrates how different shutter speeds capture a moving subject. The photo on the left was taken with a shutter speed of 1/400 of a second, the one in the middle at 1/100, and the one on the right at 1/50. Notice how you can see the blade more clearly at faster shutter speeds. Notice too that the aperture must be made larger at faster shutter speeds to let in the same amount of light, and thus, get the same exposure. In general, you can use intermediate shutter speeds for regular shooting, but will need an extra-fast shutter speed to capture a moving subject (like an athlete or a dog) and an extra-slow shutter speed if you want to blur motion (like water in a stream) or let in more light (like night photography).
The three photos below illustrates the effects of ISO. All photos were taken at f/10, but the photo on the left was taken with an ISO of 400 (low sensitivity), the one to its right at 800 (medium), and the one to the right of that at 3200 (high sensitivity). Notice how using a higher ISO allows you to use a faster shutter speed, which can be advantageous when photographing moving objects or in low-light conditions. Using a higher ISO also allows you to use a narrower aperture, which could help achieve the desired depth of field. However, notice that when you zoom in on the high-ISO image (far right), it looks grainy. This can be a problem if you plan to enlarge and print photos, so many photographers suggest using the lowest ISO you can get away with while still capturing a clear, steady picture with the desired depth of field (tripods help with this).

Practice, Practice, Plan
Regardless of the strategy you choose, it’s wise to spend time before a reporting trip getting comfortable with your camera and learning to look at the world through a photographer’s eyes. When you’re out in the field, filling the roles of both reporter and photographer, things get pretty hectic pretty fast. That’s why Zastrow says he relies heavily on his audio recorder, as he did on a tour of NASA’s Goddard Space Flight Center. “I knew I would be catching what they were saying for quotes,” Zastrow says, so he focused instead on listening and shooting.
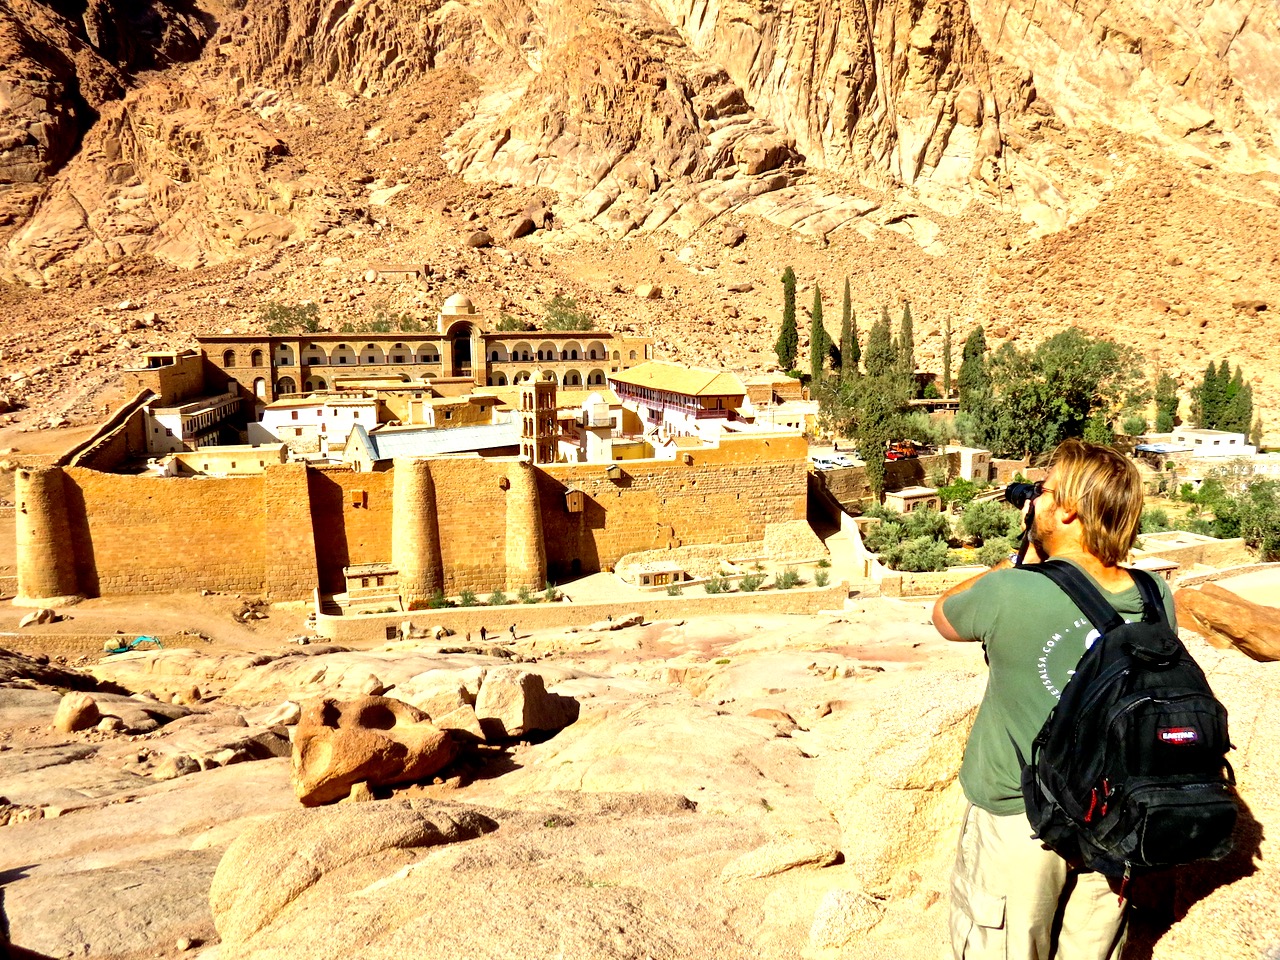
Schrope recommends that, whenever possible, you separate the tasks of reporting and photographing, and make a schedule in advance. For instance, while in Egypt reporting a story on preserving ancient manuscripts for The Washington Post Magazine, he set aside time to hike up a nearby hill to get a shot of the monastery where the manuscripts are stored (later published in another story for The New York Times), and to witness the delicate process of scanning them. Schrope says it’s also helpful to make a list of the shots you need: the scenery, the characters, and the subjects in action. “It seems basic enough, but whatever they’re doing, you need a picture of every piece of it,” he says.
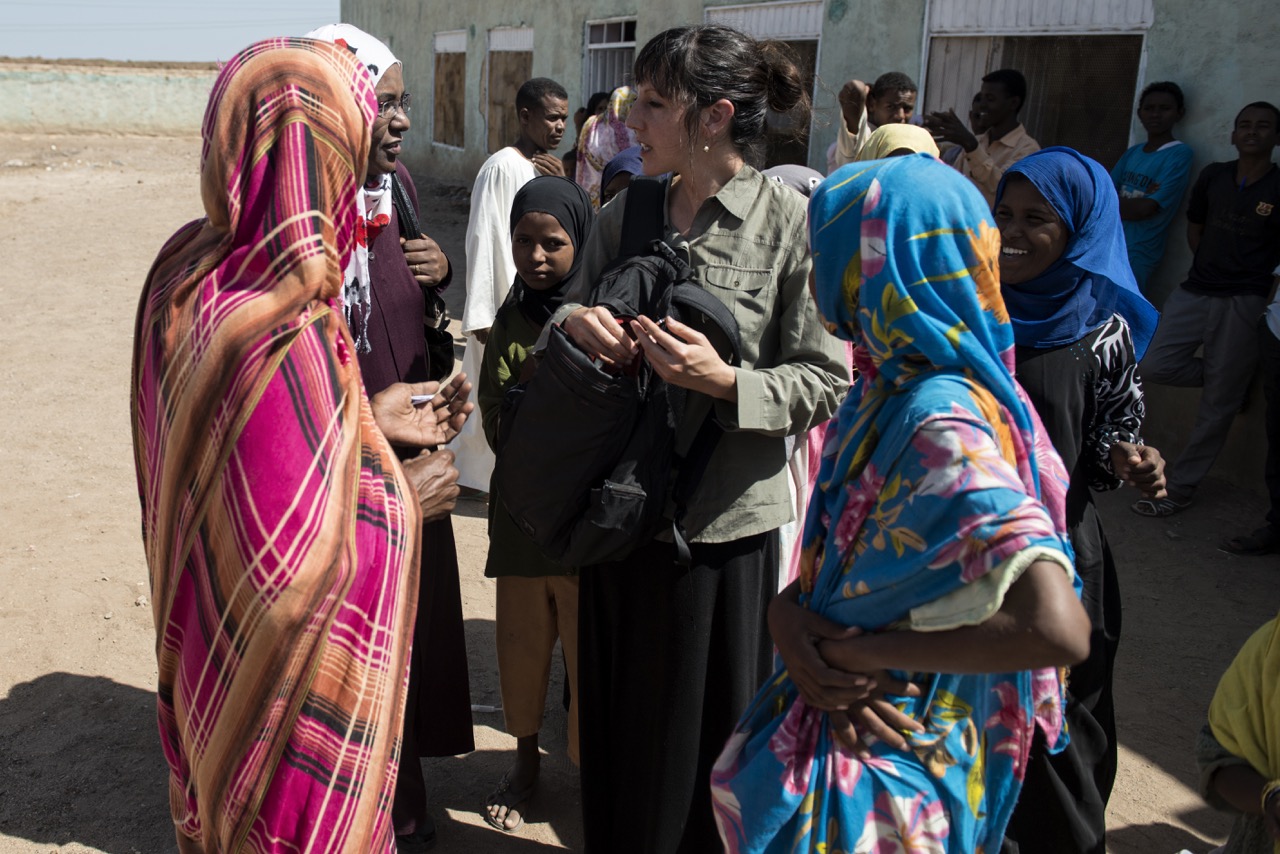
Dedicating an entire day or two of a trip to photography would be ideal, but often, circumstances force reporters to juggle everything at once. To work as efficiently as possible, freelancer Amy Maxmen likes to wear her backpack or camera bag in front of her, using the bag as a desk and its pockets as holsters for her tools. “I like to have camera or iPhone, digital recorder, and notebook within a one-second reach at all times,” she says, because “that quote or that photo moment passes fast.”
Going Pro
After you have your shots—or the chops to get them on the next assignment—you have to decide whether to include the pictures in your writer’s fee or ask for more money on top of the fee you’ve negotiated for your prose. “I’m terrible at this,” says freelancer Natasha Gilbert, whose images have been featured in Nature and the Guardian. “I have ended up giving my shots away for free,” she says, which is a shame because she often receives complements on her photos.
If a publication doesn’t have an art budget, it can make sense to donate your photos (if the alternative art is uninspiring, for instance). But, Maxmen says, it never hurts to ask for compensation. After all, “it takes time, I edit those photos, I paid for that camera out of my pocket,” she says. And, as someone who’s worked as an editor too, most recently at Nautilus, Maxmen says she’d never fault a writer for inquiring.
In Schrope’s opinion, outlets should always pay writers for photos, and writers shouldn’t undersell themselves because they are amateurs. “If you can provide the photos they need, you deserve it,” he says. Many publications can offer photographers something, although pay rates vary dramatically, from tens to hundreds of dollars per shot, depending in part on whether the story is for print or web.
But illustrating your stories isn’t the only way to make money off of your photos, once you have them, Fendt says. Another option is to sell images on stock sites like Alamy. “It’s passive income,” Fendt says. “Once it’s up there, it’s up there forever.” She’s also had success pitching photo essays, like one on lionfish for Hakai Magazine, and says many publications are in the market (Fendt recommends first approaching editors you know). If you’ve already taken and edited the photos, she says, “it’s not free money, but it kind of is.”
Julia Rosen is a freelance journalist based in Portland, Oregon. She started dabbling in photography a few years ago, and finally took the plunge and bought a DSLR last summer before departing on a six-week trip to the Arctic. She snapped more than 5,000 photos while she was there, the highlights of which can be found in local Portland galleries and on her photography website.